

Top Biology Dissection Kits for Schools and Labs?

Choosing the right Biology Dissection Kit can shape how students understand anatomy, evidence, and scientific responsibility. In a classroom, the difference appears in small details: sharp but manageable instruments, sealed specimen containers, clear labels, durable trays, and instructions that a first-year learner can follow. A laboratory needs more than attractive packaging. It needs consistent materials, accurate diagrams, safe storage, and practical guidance for cleaning and disposal.

Steve Spangler, a science-education expert and founder of Steve Spangler Science, says, “Science is not a spectator sport.” That principle fits dissection education well. Students learn more when they observe structure directly, record findings, and discuss uncertainty with a teacher. Still, a kit cannot replace instruction. It is only a tool.

Good teaching matters most.

This guide examines the top Biology Dissection Kit options for schools and labs. It considers specimen quality, instrument control, classroom durability, accessibility, documentation, and value over time. Some kits may perform well in one setting but fail in another. A compact student kit may suit a supervised lesson, while a larger laboratory kit may support repeated training and detailed comparison. No product is perfect. Even experienced instructors may need to replace missing tools, improve labeling, or adapt activities for different learners. That limitation deserves attention, not concealment. The strongest choice balances educational purpose, responsible practice, and real classroom conditions.
Top Biology Dissection Kits for Schools and Labs?

What Biology Dissection Kits Are

What Biology Dissection Kits Are

Biology dissection kits are structured sets for examining organs, tissues, and body systems through supervised practical study. A typical kit includes preserved specimens, dissecting tools, trays, gloves, eye protection, labels, and waste containers. Some also provide diagrams, lesson plans, and digital alternatives. The purpose is not simply cutting tissue. Students observe structure, record evidence, compare functions, and practise careful scientific handling.

The OECD PISA 2022 report recorded an average science score of 485 points across OECD countries, four points below 2018. This decline does not prove that dissection kits improve results. It does show why concrete learning experiences deserve careful attention. UNESCO’s Global Report on Teachers estimates a worldwide shortage of 44 million teachers by 2030. Clear instructions and reusable equipment may reduce preparation pressure, but they cannot replace professional judgment. Safety remains central. The World Health Organization’s Laboratory Biosafety Manual recommends risk assessment, protective equipment, controlled procedures, and responsible waste management.

A reliable kit should match student age, curriculum goals, specimen availability, and laboratory facilities. Sharp instruments must feel manageable, not intimidating. Labels should be readable at a crowded bench. Poor kits often include too many parts and too little guidance. That is easy to overlook. Teachers should also consider allergies, cultural concerns, accessibility, and students who prefer non-animal models. My practical view is imperfect: real specimens can create powerful memories, yet digital models may offer better repetition and less waste. The best choice depends on the lesson, not the most impressive box.

Key Components and Specimen Options

Top Biology Dissection Kits for Schools and Labs?

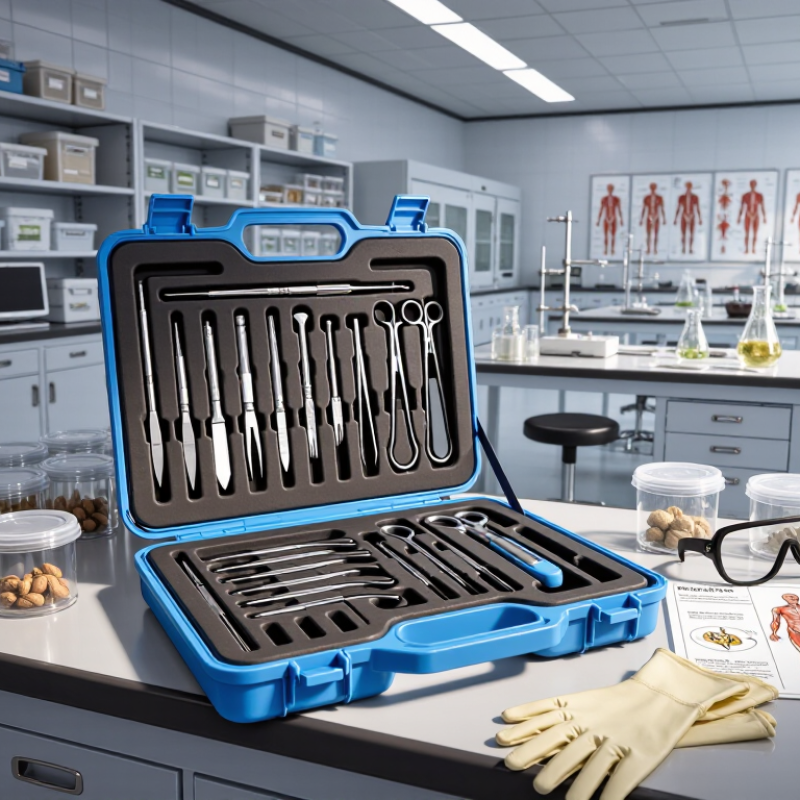
A dependable biology dissection kit begins with precise, washable tools. Essential components include a dissecting tray, blunt probes, forceps, scissors, pins, and a guarded scalpel. A magnifying lens helps students examine vessels, membranes, and muscle fibers. Protective eyewear, nitrile gloves, aprons, and disinfectant should be available at every station. Labels matter too. Clear storage boxes prevent mixed instruments and accidental damage.

Specimen choice should match the learner’s age, course goals, and local regulations. Preserved fish, amphibian, mammal organs, and invertebrates can reveal different structures. Plant specimens, such as flowers and seeds, offer a lower-risk introduction to internal anatomy. Prepared slides and three-dimensional models add useful alternatives when animal material is unsuitable. Reliable suppliers should provide species information, preservation details, safety data, and traceable documentation. Ask questions before ordering.

In classroom use, I have found that smaller groups produce better observations. One student handles tools, another records measurements, and a third sketches structures. A ruler beside the tray makes comparisons concrete. Last term, our students focused too much on cutting and missed the tissue layers. That was our mistake. A short demonstration might have helped. Teachers should also inspect instruments before each session, because a loose handle or dull blade can quickly disrupt careful work. Clean-up needs equal attention, with sealed waste containers and approved disposal procedures.

Top Biology Dissection Kits for Schools and Labs? - Key Components and Specimen Options
Kit Type Recommended Education Level Core Instruments Typical Specimen Options Main Learning Objectives Specimen Preservation Safety and Handling Requirements Typical Group Size Storage Considerations
Basic Biology Dissection Kit Middle school and introductory high school Dissection scissors, forceps, blunt probe, scalpel or safety blade, dissecting pins, tray, and reusable magnifier Plant flowers, leaves, seeds, fish, or small invertebrates Basic anatomy, external structures, symmetry, and observation skills Fresh, preserved, or plant-based materials depending on the lesson Safety goggles, gloves, teacher supervision, and controlled blade use 1–2 students per kit Keep instruments clean and dry; store sharp tools in a closed container
Flower and Plant Anatomy Kit Elementary science through high school biology Scissors, forceps, probe, hand lens, ruler, dissecting tray, and labeled diagram sheets Common flowers, fruits, seeds, stems, roots, and leaves Plant reproductive structures, pollination, seed formation, and tissue comparison Usually fresh specimens; pressed or preserved samples may support follow-up work Wash hands after handling plant material; check for allergies and irritant sap 2–4 students per kit Fresh plant material should be used promptly; dry tools after cleaning
Fish Anatomy Kit High school and introductory college biology Scalpel, dissection scissors, forceps, probe, pins, tray, ruler, and specimen identification guide Preserved bony fish specimens Vertebrate anatomy, gills, digestive organs, circulatory structures, and adaptation Commonly supplied in a laboratory preservative; follow the specimen supplier’s handling instructions Gloves, goggles, ventilation, handwashing, and proper preservative-waste procedures 1–2 students per kit Keep sealed when not in use; store preserved specimens according to the product safety information
Frog Anatomy Kit High school and college introductory anatomy Dissection scissors, scalpel, forceps, blunt probe, pins, tray, ruler, and anatomy worksheet Preserved frog specimens Organ systems, muscle arrangement, body cavities, and comparative vertebrate anatomy Usually chemically preserved and sealed until the practical activity Use splash-resistant eye protection, nitrile gloves, ventilation, and teacher-led disposal 1–2 students per kit Store sealed specimens in a cool, designated area away from food and heat sources
Rat Anatomy Kit Advanced high school and college biology Scalpel, dissecting scissors, forceps, probe, pins, tray, ruler, and detailed organ-system guide Preserved rat specimens Mammalian anatomy, organ relationships, respiratory, digestive, urogenital, and circulatory systems Preserved specimens supplied in sealed packaging or containers Gloves, goggles, ventilation, careful sharps management, and regulated waste handling 1–2 students per kit Keep containers tightly closed and inspect packaging for leaks before class
Invertebrate Comparative Anatomy Kit High school, college, and introductory zoology Fine forceps, dissecting needles, scissors, probe, tray, pins, and low-power magnifier Earthworms, crayfish, grasshoppers, clams, or other commonly studied invertebrates Body plans, segmentation, appendages, feeding structures, and evolutionary comparison Fresh, preserved, or ethically sourced specimens depending on the organism Use gloves and eye protection; verify local rules for specimen acquisition and disposal 2 students per kit Separate fresh and preserved materials; clean instruments immediately after use
Microscopy and Microdissection Kit Advanced high school, college, and laboratory training Fine-point forceps, minuten pins, micro-scissors, probes, slides, cover slips, and a stereomicroscope or compound microscope Small invertebrates, plant tissues, insect parts, embryos, or prepared tissue sections Fine structures, tissue organization, magnification, and careful specimen manipulation Fresh, fixed, stained, or permanently mounted specimens Handle glass slides carefully; use appropriate stains and follow chemical safety procedures 1 student per workstation Protect optical equipment from dust and moisture; store slides in labeled boxes
Digital or Virtual Dissection Kit All levels, including distance learning and introductory courses Computer or tablet, display, interactive software, digital worksheet, and optional anatomical models Digitized animal anatomy, 3D organs, virtual slides, or interactive plant structures Spatial anatomy, system relationships, terminology, and pre-lab preparation Not applicable; digital specimens do not require chemical preservation 1 student per device or small collaborative group Maintain secure user accounts, updated software, and reliable data backups
Reusable Anatomical Model Kit Elementary science through college instruction Removable models, labeled parts, forceps, probe, tray, and anatomy reference cards Human organs, animal body systems, flowers, seeds, or skeletal structures Structure-function relationships without using biological specimens Low biological risk; clean shared components between classes Small groups or whole-class demonstration Store parts in labeled compartments and avoid excessive heat or direct sunlight
Advanced Laboratory Dissection Set College, vocational training, and supervised research laboratories Scalpels with replaceable blades, dissecting scissors, several forceps types, probes, pins, trays, rulers, and sharps container Approved preserved specimens, tissue samples, organs, or research-related biological material Detailed anatomical relationships, technique development, documentation, and specimen analysis Fresh, fixed, or preserved according to the approved laboratory protocol Requires documented risk assessment, training, personal protective equipment, and institutional waste procedures 1 student or researcher per workstation Use a locked sharps area; maintain inventory and inspect instruments before every session

How Schools and Labs Use Dissection Kits

Schools and teaching laboratories use dissection kits to turn biological structures into visible, workable evidence. A well-designed kit may include preserved specimens, blunt probes, forceps, trays, gloves, and labeled reference sheets. Teachers use these tools to compare organs, trace tissue relationships, and discuss adaptation. Students do more than memorize diagrams.

The Education Endowment Foundation’s Teaching and Learning Toolkit reports that practical science can support about four additional months of progress, although the evidence remains very limited. That caution matters. Dissection is not automatically effective. Students need a clear question, a short demonstration, and time to record observations. A crowded tray often creates confusion. Smaller groups usually allow safer handling and better discussion.

In school laboratories, kits support structured investigations. Students may measure organ size, identify muscle layers, or compare normal and modified structures. In professional training environments, technicians also use them to practice labeling, specimen handling, and contamination control. The World Health Organization’s Laboratory Biosafety Manual, fourth edition, stresses risk assessment, protective equipment, and controlled procedures before practical work begins. Clean surfaces matter. Waste planning matters too. Some teachers may still overvalue the specimen itself and undervalue reflection. That is a weakness worth correcting. A simple observation table can reveal more learning than a rushed cutting exercise.

Safety, Ethics, and Storage Requirements

Top Biology Dissection Kits for Schools and Labs?

Safety, Ethics, and Storage Requirements

A suitable dissection kit starts with safety, not the number of instruments. Choose blunt probes, rounded scissors, forceps, protective gloves, goggles, and washable trays. Every tool should be easy to inspect and clean. Supervisors need clear procedures for cuts, spills, and accidental exposure. Keep an eyewash station nearby, and provide strong ventilation when preservatives are present. Students should never work without trained adult supervision.

Ethics matter equally. Use specimens from documented, lawful sources and avoid endangered or poorly identified organisms. Explain the purpose of each activity before handling materials. Offer models, digital simulations, or prepared slides when dissection conflicts with a student’s beliefs or wellbeing. Respectful language helps. The specimen is not merely a classroom object. Teachers should also verify local education, health, and waste rules before ordering supplies.

Storage failures can quietly create serious problems. Keep instruments dry, locked, and separated from preserved materials. Store containers upright, sealed, clearly labeled, and away from heat and direct sunlight. Maintain an inventory with purchase dates, condition notes, and disposal instructions. Check blades and hinges regularly; one damaged tool can change a calm lesson quickly. I have seen storage plans look excellent on paper but fail during busy term changes. That weakness deserves review. A monthly inspection, spill kit, first-aid supplies, and documented cleaning routine make the system more dependable.

How to Choose the Right Dissection Kit

Choosing the right dissection kit begins with the lesson, not the equipment list. A middle school class needs different tools from an advanced laboratory group. Define the specimen type, class size, student age, and learning objectives. A basic kit may include forceps, scissors, probes, trays, and protective eyewear. Check that each tool fits smaller hands and feels steady during use.

Safety should guide every purchase. Select kits with blunt options for beginners and sharp tools only when trained supervision is available. Look for corrosion-resistant materials, secure handles, and containers that prevent loose instruments from shifting. Reusable trays can reduce waste, but they need clear cleaning instructions. I have found that teachers often overlook storage. A labeled drawer prevents missing forceps before the next practical session.

Match the kit to your teaching environment. If students compare structures, choose tools that support careful separation rather than speed. For limited budgets, combine durable instruments with lower-cost practice models. Preserved specimens may provide realism, while synthetic models offer easier storage and repeated use. Review classroom policies, ventilation needs, accessibility, and disposal procedures before ordering. A kit can appear complete yet still lack enough trays for group work. I still make that mistake when planning quickly. Ask another instructor to test the layout, because practical experience often reveals problems that product descriptions hide.